Raspberry Pi SSH: Enable & Secure Your Connection | Guide
Is your Raspberry Pi securely accessible, or are you unknowingly leaving a door ajar? Securing your Raspberry Pi's SSH connection is paramount to protecting your projects and data from potential threats. Let's delve into the crucial steps required to fortify your remote access.
The Raspberry Pi, a marvel of compact computing, has become a staple for enthusiasts, developers, and professionals alike. Its versatility lends itself to a myriad of applications, from home automation and robotics to media servers and educational tools. However, its very accessibility can be a double-edged sword. The default configuration of the Raspberry Pi OS, for security reasons, disables the SSH server. This means that, out of the box, you can't remotely access your Pi via the Secure Shell (SSH) protocol. SSH, a crucial component for remote access and management, requires deliberate activation to ensure the security of your device. Without proper configuration, your Pi can become vulnerable to unauthorized access, data breaches, and potential misuse. Luckily, enabling and securing SSH on your Raspberry Pi is a manageable process, offering you control and peace of mind.
The following table encapsulates the various methods and configurations associated with securing SSH connections on a Raspberry Pi, providing a consolidated resource for users of varying technical backgrounds. This table is designed to be easily inserted and utilized within a WordPress environment or similar content management systems:
| Feature | Details | Configuration Steps | Security Implications | Additional Considerations |
|---|---|---|---|---|
| SSH Server Status (Default) | Disabled by default in Raspberry Pi OS (for security). | N/A (Default) | Reduces the initial attack surface. | Users must intentionally enable and configure SSH. |
| Enabling SSH - Method 1: Raspberry Pi Imager | Recommended for headless setups (no monitor/keyboard). |
| Significantly reduces the risk of needing to manually configure settings, streamlining the setup process. Pre-configuring SSH prevents the need for physical access to initially enable it. | Ensure you have a secure password for the SSH user. Consider pre-configuring Wi-Fi for ease of initial setup. |
| Enabling SSH - Method 2: Directly on Raspberry Pi (Desktop Environment) | For Pis with a connected monitor, keyboard, and mouse. |
| Requires physical access to the Raspberry Pi. | Can be convenient for those who have access to the physical device and prefer a graphical interface. |
| Enabling SSH - Method 3: Manual Enablement (Without GUI) | Enables SSH directly via the command line. Useful for headless setups, but generally less recommended due to the Raspberry Pi Imager's ease. |
| Least secure initial setup due to lack of pre-configured security settings, especially if the file is created from an insecure source or computer. | Requires knowledge of command line interface. Should be used only for more advanced users. |
| Finding the Pi's IP Address | Essential for connecting remotely. |
| Provides the critical information necessary to initiate a remote SSH session. | The IP address can change. Consider assigning a static IP address or using a hostname. Note the interface (e.g., eth0 for Ethernet, wlan0 for Wi-Fi). |
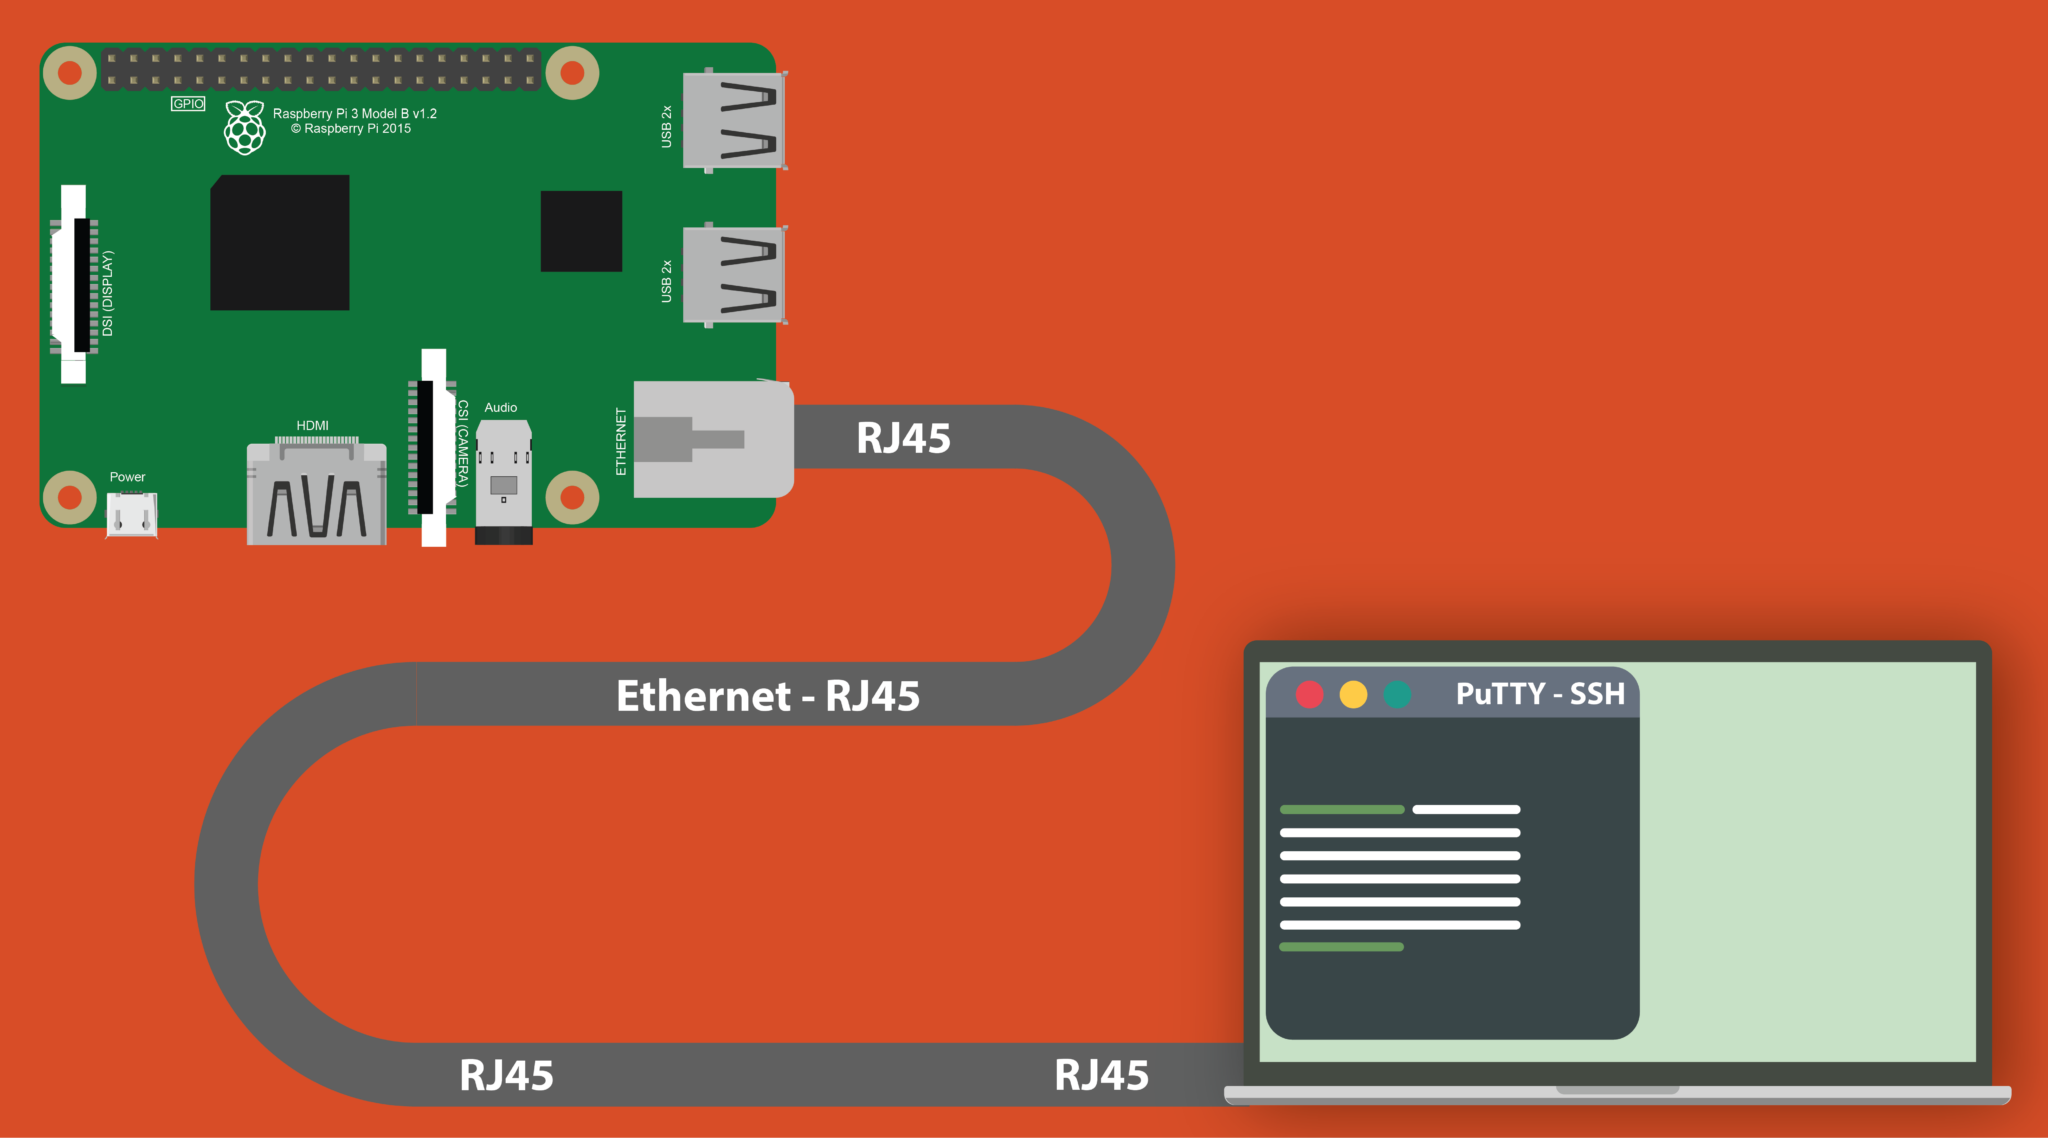
| Connecting to SSH from Windows (using PuTTY) | A common method for Windows users. |
| PuTTY provides a secure and reliable way to access a Raspberry Pi. | Save your session for easy reuse. Remember to close the PuTTY window when you're finished. |
| Connecting to SSH from macOS/Linux (using Terminal) | The built-in terminal is generally the standard way to connect on Unix based systems. |
| A built-in, secure method of connection. Common and easy to use. | Ensure the username (usually "pi") is correct. Consider adding a key for passwordless login. |
| Changing the Default SSH Port | Enhances security by obscuring the service's location. |
| Significantly reduces the risk of automated attacks that target the default SSH port. Often a good first step in improving your security. | Remember the new port number when connecting. Firewall rules may need to be adjusted. |
| Firewall Configuration (iptables) | Controls network traffic flow. |
| Provides an additional layer of defense by limiting allowed traffic. Minimizes access. | Be very careful with firewall rules; misconfiguration can lock you out of your Pi. Test your new configuration thoroughly. |
| Port Forwarding on your Router | Necessary for accessing your Pi from outside your local network. |
| Allows external access to your Pi, enabling remote management from anywhere. | Ensure the external port you use is not blocked by your ISP. Test the setup thoroughly from an external network (e.g., your phone's mobile data). |
| Using Public Key Authentication | Improves security by eliminating password-based login. |
| Significantly reduces the risk of brute-force attacks. Password-less login also improves security. | Always keep your private key secure. Losing your private key means losing access. |
| Regular Security Audits | Essential for continuous security monitoring. | Regularly check your system logs, monitor network traffic, and keep your Pi's software updated. | Identifies and mitigates vulnerabilities. Ensures your Raspberry Pi remains secure. | Use security tools (e.g., fail2ban) to monitor for suspicious activity. Keep your system updated with the latest security patches. |
For more detailed information, you can refer to the official Raspberry Pi documentation.
Official Raspberry Pi Documentation
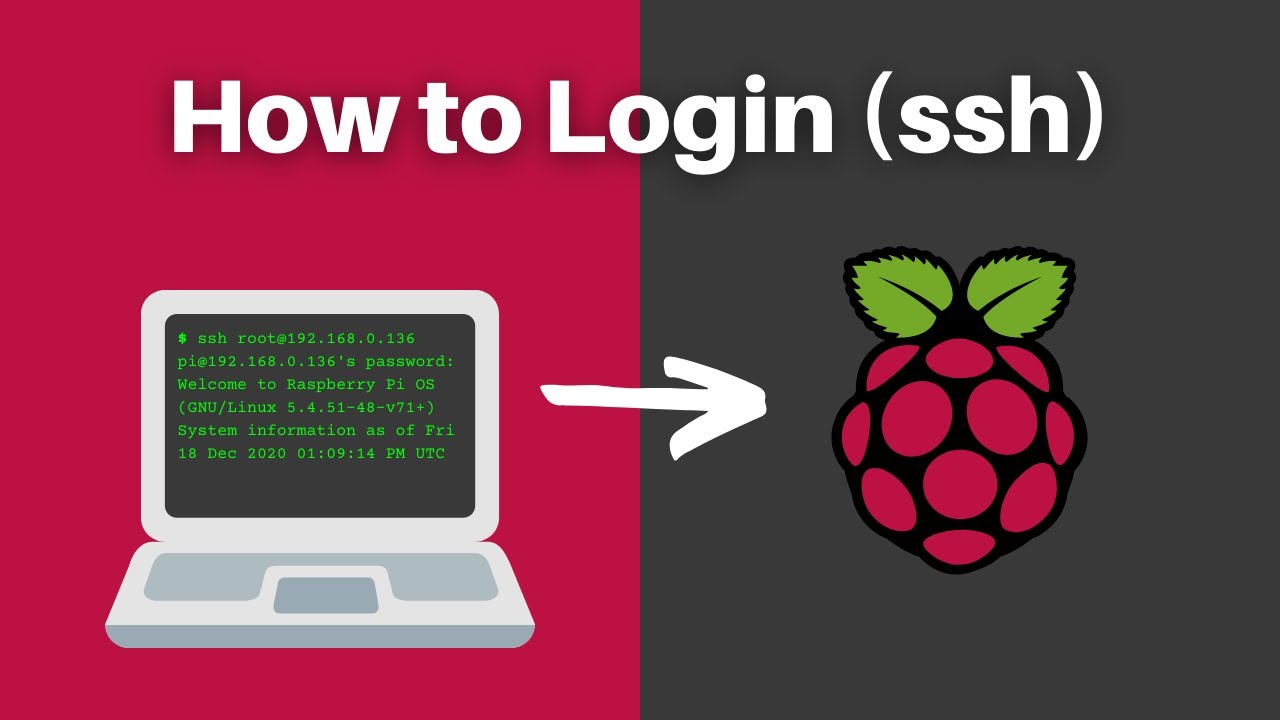
Once SSH is enabled, the ability to connect remotely becomes a reality. For Windows users, PuTTY is a widely-used and reliable SSH client. Simply download and install it, enter your Pi's IP address, and leave the port set to the default of 22, or configure the port in your SSH configuration file. Once configured, this allows seamless remote access, and the process is straightforward. For those using macOS or Linux, the terminal provides a convenient and built-in method of establishing an SSH connection. By typing ssh pi@ (replacing
Beyond the basic configuration, several advanced techniques further bolster the security of your Raspberry Pi's SSH access. Modifying the default SSH port (22) is a crucial step in warding off automated attacks. The default port is a well-known target for hackers, so changing it can make your Pi significantly less vulnerable. To modify the port, you'll need to edit the SSH configuration file, which is located at /etc/ssh/sshd_config. Using a text editor like nano (sudo nano /etc/ssh/sshd_config), you can locate the line Port 22 and change the '22' to a custom port number like 2222 or any number of your choice, if you are concerned about the port already in use or there is a possibility of clash with another service, always go for higher port range like 49152-65535, uncommenting the line, saving the file, and restarting the SSH service will put the changes into effect. Moreover, employing a firewall like `iptables` can control the traffic that is allowed to your Raspberry Pi. By configuring `iptables`, you can restrict access to only the ports you require, adding an additional layer of protection. Finally, generating and utilizing SSH keys for authentication provides a far more secure login method than passwords, eliminating the risk of brute-force attacks, and thus protecting your Pi even further.
When operating in a networked environment, particularly when connecting to a Raspberry Pi over the internet, understanding port forwarding is crucial. This process involves configuring your router to direct incoming traffic on a specific port to your Raspberry Pi. For example, you might forward external port 9022 to port 22 on your Pi. This means that to connect to your Pi from the internet, you would use the address x.x.x.x:9022, and the router would then forward this connection to the Pi's SSH service listening on port 22. This method allows you to access your Pi from anywhere in the world, provided you have an internet connection and know your Pi's public IP address.
It's important to remember that the methods used to enable SSH, as well as the security measures implemented, are inherently tied to how you intend to use your Raspberry Pi. If you are utilizing the Pi as a headless server (without a monitor or keyboard), configuring SSH through the Raspberry Pi Imager is particularly convenient. On the other hand, if you have direct physical access to the Pi and are working with a desktop environment, using the `raspi-config` tool is equally practical. If you're using Ansible and changing the SSH port from the default can initially appear to introduce problems, especially as Ansible relies on SSH and the default port 22, but adjustments in your Ansible configuration and host files can overcome these issues.
Accessing your Raspberry Pi remotely via SSH is an essential skill for anyone working with these versatile devices. Whether you're a developer, a hobbyist, or an IT professional, mastering the process of securely enabling and managing SSH access unlocks a wealth of possibilities. By following the strategies outlined here, you not only gain the ability to work remotely but also equip yourself with the knowledge to create a safe and secure computing environment. From adjusting the SSH port to employing more advanced techniques, the goal is always to enhance security, ensuring the protection of your data and projects. Securing your Raspberry Pi's SSH is more than just a technical exercise; it's a critical investment in your peace of mind and the integrity of your work. By taking the time to properly configure and secure SSH, you empower yourself to explore the full potential of your Raspberry Pi with confidence.

